


Steam Wand Tips: How to Froth Milk Like a Pro
|
|
Time to read 8 min
Your Cart
Your cart
Favorites


Shop by Brands

Shop by Brands
Shop by Brands
Shop by Brands


Shop by Brands
Shop by Brands

|
|
Time to read 8 min
Frothing milk may seem like a simple task, but the difference between a good cup of coffee and an exceptional one often lies in how well you froth your milk. Mastering the steam wand involves more than just turning it on and dunking it into milk. Achieving silky, velvety foam requires the right technique, precise control, and a bit of practice.
But don't worry; you don't need to be a professional to master it. With the right tips and tricks, you can froth milk like a pro, creating café-quality drinks right at home.
In this guide, we'll walk you through expert steam wand tips that will help you achieve perfectly textured milk, smooth foam, and stunning latte art every time. Let's get started!
Purge the steam wand before frothing to clear excess water and keep steam flow consistent.
Hold the wand just below the milk’s surface at a slight angle to create a smooth vortex and avoid big bubbles.
Add air only for the first few seconds while the milk is still cool to build stable microfoam.
Froth between 130°F and 150°F to protect the milk’s texture and flavor.
Adjust wand depth and angle as needed to fix large bubbles or weak foam and refine your technique.
Perfecting the use of a steam wand is the secret to transforming your coffee into a rich, velvety masterpiece. It's all about achieving a silky and smooth texture that enhances the flavor and presentation of your coffee.
Whether you're new to frothing or looking to refine your steam wand technique, these expert tips will help you understand how to get the most out of your steam wand.
So, let's explore the top steam wand tips to froth like a pro and craft café-quality drinks at home.
When it comes to milk frothing, the first and most crucial step is choosing the right milk and ensuring it's at the ideal starting temperature. Fresh, cold milk is your best bet for achieving that right texture that makes professional coffee stand out.
Why cold milk?
Cold milk provides better control over the frothing process, enabling you to inject air slowly and evenly.
This is essential for creating a stable texture that’s smooth and velvety, rather than too airy or foamy. If the milk is too warm to start with, it may cause the steam to burn it, leading to a less-than-ideal texture and taste.
For the best results, opt for whole milk. The higher fat content helps create richer, creamier foam. However, if you're using alternatives like oat milk, almond milk, or soy milk, note that they may behave differently.
Oat milk tends to froth well, while almond milk may require a bit more patience to achieve the desired foam consistency.
Pro Tip: Always pour your milk directly from the fridge into your frothing pitcher for optimal frothing conditions. Starting with cold milk sets you up for success, helping you create the perfect foam without rushing the process.
Before you even think about frothing, one crucial step is often overlooked: purging your steam wand.
Over time, steam wands can accumulate residual milk or moisture from previous use, which can cause clogs or inconsistent steam output. Purging the wand removes any leftover milk or water, ensuring a consistent steam flow and fresh, clean froth.
If you skip this step, you might end up with a soggy, uneven foam or even a burnt taste in your milk.
Here's how to purge:
Simply turn on the steam wand for about 1-2 seconds before you begin frothing. You'll hear a hissing sound as the excess moisture escapes.
This action ensures that the steam wand is ready to go, providing optimal steam pressure and preventing any milk residue from interfering with your frothing.
By purging your steam wand, you're setting yourself up for a smooth, flawless frothing experience. It's a small step, but it makes a big difference in the quality of your foam.
The positioning of your frothing pitcher can make or break your milk texture. It's not just about holding the pitcher; it’s about getting the right angle and depth to create the perfect vortex and achieve smooth, creamy foam.
How to position your pitcher:
Angle: Hold the frothing pitcher at a slight tilt, about 15 to 30 degrees. This angle helps the steam wand create a whirlpool effect, which is key to achieving that silky microfoam.
Steam Wand Depth: The steam wand should be placed just below the surface of the milk, not too deep. You want to create a gentle swirl, injecting air into the milk while maintaining consistent foam. Too deep, and you'll create larger bubbles. Too shallow, and the milk won't froth properly.
Pro Tip: Keep the steam wand close to the edge of the pitcher, about 1 inch below the milk's surface. This position creates a gentle vortex that minimizes disruption to the milk, allowing the foam to develop evenly.
One of the key steps is knowing when to inject air into your milk. The secret? Inject air early, while the milk is still cool, but not for too long. This is the technique that gives your milk the smooth, silky texture you’re after without turning it into a mess of large bubbles.
How to do it right:
Turn on the steam wand and place it just below the surface of the milk, at a shallow angle.
Inject air for 3 to 5 seconds. You'll hear a soft hissing sound as air is drawn into the milk.
Stop texturing at ~100–120°F and finish heating without further air injection.
Watch the texture. As the milk begins to froth, you’ll notice it starts to expand. The goal here is to introduce enough air to create microfoam, not a bubbly mess.
Suggested Read: Milk Frothing Pitchers and Containers Guide
Once you've injected air and your milk is beginning to froth, the next key step is to create a stable vortex. This swirling motion is crucial for achieving a smooth, even foam without large bubbles or air pockets. It’s the foundation of that perfect microfoam texture you're after.

A well-formed vortex allows the milk and foam to blend evenly, creating a consistent texture throughout the entire pitcher.
Adjust the steam wand depth slightly to maintain that swirling motion. Keep the wand just below the surface to create the right amount of turbulence.
Position the wand at an angle that encourages the milk to move in a circular motion. The milk should rotate gently, helping to mix the foam and milk evenly.
Slow and steady: Don’t rush the process. A slow, steady vortex creates the best texture, as the milk will gradually incorporate the foam for a smoother result.
The goal is to create a consistent and smooth foam, not just a foamy mess. Keep a close eye on the texture as the vortex forms.
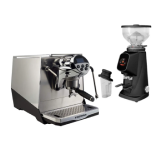
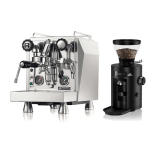
Serve a premium espresso consistently in your café with the Enigma Super Traditional X Wide at Pro Coffee Gear. This combines versatile brewing and precise milk steaming, letting you craft rich, café-quality drinks effortlessly every time.
Even the most experienced baristas occasionally face challenges with frothing. If your milk isn’t turning out as expected, don't worry. Many issues can be solved with simple adjustments.
Below are common frothing problems and specific solutions to help you achieve the perfect foam consistency:
If your milk isn't frothing, it could be due to improper air injection or incorrect placement of the steam wand.
Solution:
Check wand depth and position: Make sure the wand is just below the milk’s surface, not too deep or shallow.
Inject air early: Start introducing air while the milk is still cool, allowing for gradual foam development.
Thin or weak foam usually means the milk wasn’t frothed long enough or the temperature wasn't high enough.
Solution:
Increase frothing time: If the foam isn’t thick enough, give it a bit more time under steam.
Monitor milk temperature: Aim for 130°F to 150°F. Too low, and the foam will be weak; too high, and it could ruin the texture.
Large, unsightly bubbles can form when the wand is positioned too deeply or you're over-injecting air.
Solution:
Adjust steam wand depth: Position the wand just below the milk’s surface and avoid over-injecting air.
Swirl the milk: Gently swirl the pitcher to break down larger bubbles and help the foam settle.
Overheating the milk can result in a burnt taste and spoiled texture.
Solution:
Watch your temperature: Milk should not stretch past ~30–40% volume.
Use a thermometer: A thermometer can preventing overheating and ensuring perfect milk every time.
Keep experimenting with the steam wand position and the amount of air you’re injecting to find the perfect balance.
Mastering the art of frothing milk with a steam wand is a key skill for any coffee enthusiast, whether you're preparing your morning latte or perfecting a cappuccino for guests. From the proper technique of injecting air early to achieving the ideal temperature and avoiding common frothing pitfalls, every step plays a role in creating that perfect microfoam.
For those looking to elevate their milk frothing skills, Pro Coffee Gear offers premium machines, tools, accessories, and parts to help refine your technique. With the right equipment and expert guidance, you can consistently create café-quality foam, elevating your coffee experience at home or in a café.
Shop Pro Coffee Gear for precision steam wands and premium coffee equipment to perfect your brewing skills and enjoy perfectly frothed milk with every cup!
To achieve latte art, your milk should have a velvety, smooth texture with small, uniform bubbles. If the foam looks too bubbly or separated, it’s likely not the right consistency. Try swirling the milk gently after frothing. If it’s glossy and has a silky texture, you’re ready to pour!
Burnt milk typically occurs when the temperature exceeds 160°F, causing the milk proteins to break down and produce a bitter taste. Keep your milk between 130°F and 150°F and monitor it closely to avoid overheating, which can result in a sweet and creamy texture instead of a scorched flavor.
Whole milk is ideal for frothing, as its higher fat content creates richer, creamier foam. However, oat milk is an excellent alternative for those avoiding dairy, as it froths well and has a smooth, creamy consistency. Experiment with different types to find what works best for your taste!
Large bubbles form when the steam wand is too deep or not angled correctly. Ensure the wand is positioned just beneath the surface of the milk, approximately 1 inch deep. If you’ve already frothed it, gently swirl the milk to break down the bubbles and improve the foam texture.
Non-dairy milks, like almond or soy, can be trickier to froth because they don’t have the same fat content as cow’s milk. To achieve a smoother texture, steam at a lower temperature and use a high-quality, barista-specific non-dairy milk specifically designed for frothing. This will help you achieve a creamier consistency without compromising texture.
Our team can help you find the best fit based on your space, volume, and budget.
Talk to a Specialist

