


How to Create Espresso Latte Art at Home
|
|
Time to read 11 min
Your Cart
Your cart


Shop by Brands

Shop by Brands


Shop by Brands
Shop by Brands

|
|
Time to read 11 min
Coffee art is a creative expression that transforms your simple cup of coffee into something extraordinary. Mastering espresso designs allows you to elevate your daily ritual and impress your friends with stunning latte creations.
At its core, espresso designs involve pouring steamed milk into an espresso with precision to create intricate patterns. From hearts to rosettas, these designs enhance both the look and the experience of your coffee. While it may seem challenging, latte art is more accessible than you think with the right tools and techniques.
In this blog, we will walk you through the steps of steaming milk, pouring espresso, and creating beautiful designs, highlighting the best equipment to make it easier. With a bit of practice, you will soon be creating professional-quality lattes right at home!

To start making beautiful espresso designs at home, you will need a few essential tools:
An espresso machine with a good-quality steam wand is crucial for making espresso designs. The steam wand helps you froth the milk to the perfect consistency, creating microfoam that’s essential for intricate patterns like hearts and rosettas.
If you are serious about elevating your at-home coffee game, investing in a reliable machine is a key step. Pro Coffee Gear offers a wide range of high-quality espresso machines designed for you. Whether you are looking for precision, reliability, or advanced features, you will find the perfect fit to get started on your latte art journey.
A clean, damp cloth is essential for safety and maintenance. Use it to clean the steam wand after each use and protect yourself from the hot steam. Regularly purging the steam wand with a towel will ensure that the milk doesn't clog it, maintaining its performance for perfect foam.
A 12-ounce steam pitcher is ideal for frothing milk. It allows enough room for milk expansion and provides better control over pouring your designs. A larger pitcher makes it easier to create smooth and consistent foam, making it essential for accurate espresso designs.
A thermometer probe helps you monitor the milk’s temperature as it steams. Steaming milk to the right temperature ensures the milk is at its best, creating the perfect texture for pouring your espresso designs. Overheating milk can result in burnt flavors that affect the quality of your art.
A 6 to 12-ounce cafe-style mug is perfect for crafting espresso designs. This size helps maintain the right proportions between espresso and steamed milk, giving you just enough space to create your designs while keeping the balance of your drink intact.
Choosing the right type of coffee mug enriches your drink by its size or even its material.
Whole milk works best for making microfoam due to its balance of fat solids and water, which helps create a smooth, creamy foam. Non-dairy alternatives like oat or almond milk, especially for those of you who want specialties, can also work well for espresso designs, producing froth that’s easier to work with.
While not essential for beginners, a latte art tool or a toothpick can help you refine and perfect your designs. These tools are great for adding detail to your art and ensuring that your patterns are sharp and precise.
With the right equipment and some practice, you will soon be able to create stunning espresso designs at home, impressing both yourself and your guests.
Now that you have all the necessary tools, let’s understand how to create espresso designs at home.
Whether you are new to the art or aiming to perfect your technique, understanding the nuances of milk, steaming, and pouring will set you on the path to creating beautiful latte art right at home.
Before diving into the intricacies of pouring, understanding milk is crucial in creating the perfect base for your designs. The quality of the milk determines the texture of the foam, which is essential for creating detailed patterns.
Whole Milk: The best choice for most coffee artists, thanks to its higher fat content that creates smooth, creamy microfoam. Whole milk holds designs well, making it ideal for intricate patterns like hearts, tulips, and rosettas.
Non-Dairy Milk: Oat milk is the most popular non-dairy choice, as it froths better than almond or soy milk, though it doesn’t reach the same creamy texture as whole milk. For those using non-dairy milk, look for "barista" versions, which are specifically designed for frothing and creating better foam.
Freshness: Fresh milk will always produce the best results. Milk that’s closer to its expiration date tends to be thinner and harder to froth, making it more difficult to achieve stable microfoam for latte art.
Proper microfoam is essential for pouring clean, detailed designs. Here’s how to steam your milk to perfection:
1. Chill the Pitcher: Start by chilling your steam pitcher in the refrigerator for about 30 minutes. This creates a longer steaming time and better control over the texture.
2. Fill the Pitcher: Pour cold milk into the pitcher, leaving enough room for it to expand as it froths. For a 12-ounce pitcher, pour about 10 ounces of milk.
3. Position the Steam Wand: Insert the steam wand just below the surface of the milk, about an inch below the milk’s surface. Position it at a 45-degree angle to create a whirlpool motion.
4. Purging and Steaming: Purge the steam wand to remove any residual water, then turn it on. You should hear a gentle stretching sound as air is incorporated into the milk. After a few seconds, submerge the wand deeper into the milk and continue steaming until the milk reaches about 150°F to 160°F.
5. Swirl and Tap: Once you have reached the desired temperature, remove the steam wand and tap the pitcher on the counter to remove large bubbles. Swirl the milk gently to recombine any separated foam, leaving a velvety, smooth texture for your design.
Note: Great microfoam isn’t just about the technique; your espresso machine matters, too. If you're making coffee at home, the right setup can elevate every pour. At Pro Coffee Gear, you'll find a wide range of espresso machines built for precision & quality. Our range of espresso machines supports every kind of home coffee pursuit.
Creating latte art comes in many designs. Let’s study them one by one from basic to advanced.
Suggested read: Beginner's Guide: Making Your Own Coffee at Home
Mastering espresso designs involves learning the foundational pouring techniques and gradually advancing to more complex patterns. Here’s a deeper look at the progression of latte art designs, from basic shapes to more intricate forms.
Image created by AI
The Monk’s Head design is the most basic and foundational form of latte art. It’s essentially the starting point for all other designs, serving as the foundation for mastering control over the pour.
How to Create:
Begin by pouring milk into the center of the cup, letting it form a large foam-filled area. As you pour, the crema from the espresso will remain around the perimeter of the foam, creating a clear ring. To finish, raise the pitcher slightly at the end to form a small indent in the center, creating the "head" of the design.
The Monk’s Head teaches you how to control your pour and get comfortable with the milk's texture. It also provides the basic framework for more complex designs like hearts, tulips, and rosettas.
Image created by AI
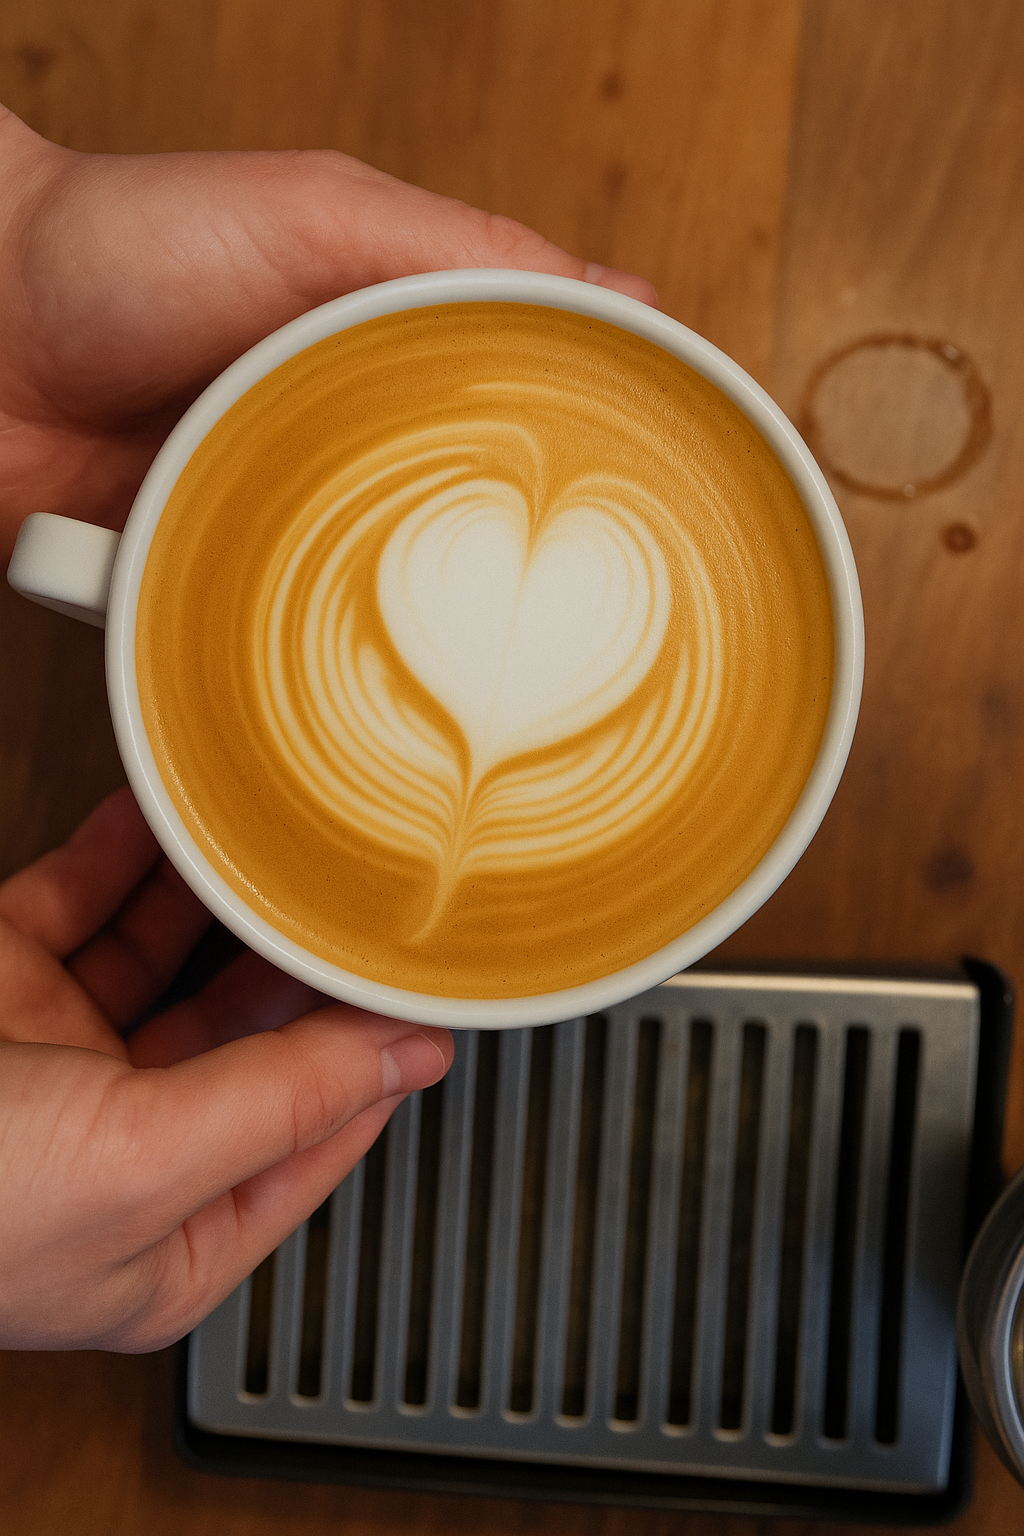
The Heart design is a natural progression from the Monk’s Head and is the perfect design for beginners who are ready to get a bit more creative with their pouring.
How to Create:
Start by pouring the milk into the center of the espresso cup as you did for the Monk’s Head. However, this time, instead of pulling up immediately, you’ll gently move the pitcher to create the familiar heart shape. As the milk fills the cup, pull the spout through the center to form the pointed tip of the heart.
The Heart design allows you to practice control over the pour and introduces the concept of pulling through the milk to form a distinct shape.
Image created by AI
The Tulip design is more advanced and involves stacking multiple layers of hearts to create a beautiful, intricate, flower-like design. It requires a steady hand and the ability to manage multiple pours.
How to Create:
Begin by pouring the first heart in the center, just like you did for the basic heart. Then, raise the pitcher slightly and pour another heart just above the first. Repeat this process to stack two or three layers of hearts. As you pour the last heart, pull through to form the stem of the tulip.
The Tulip design challenges you to pour multiple layers, giving you practice in timing, control, and layering your designs for a more advanced finish.
Image created by AI
The Rosetta is one of the most complex and beautiful patterns in latte art. It resembles the shape of a leaf and requires a combination of wrist movement and precise pouring.
How to Create:
Start by pouring the milk into the center of the cup, just like with the Heart and Tulip designs. However, as you pour, use your wrist to gently rock the pitcher back and forth to create the signature leaves of the rosetta.
Once you have created the leaf shape, pull through from the center to finish the design with a small heart at the top.
The Rosetta is considered a more advanced design because it requires precise control over the pour, as well as fluid wrist movements to achieve the leaf pattern. The process of making the rosetta teaches you how to manipulate the steam wand and pour technique to create a flowing, intricate design.
Image created by AI
Once you have mastered the basic techniques, you can explore more intricate designs. Here are a few ideas to explore:
Writing in the Foam:
After creating a basic pattern, you can use a toothpick or skewer to drag through the foam and create letters, symbols, or abstract designs. This adds a personal touch to your latte art and challenges your creativity.
Using Stencils:
You can also use stencils to create designs by sprinkling cocoa powder, cinnamon, or matcha powder over the foam. Simply place the stencil on top of the foam and sprinkle your desired topping to create a delicate pattern.
Layered Patterns:
Experiment with pouring multiple layers of different designs within the same cup. For instance, create a base of hearts, followed by a rosetta on top, to create a unique and eye-catching effect.
Abstract Art:
For those who are feeling adventurous, try creating abstract art by manipulating the milk in different directions, using various pouring angles and speeds to create fluid, organic patterns that don't follow the typical design rules.
Creating beautiful espresso designs requires practice, but with the right equipment and knowledge, anyone can master the art of latte art. With patience and creativity, you can elevate your coffee experience and impress anyone who enjoys your lattes.
Now that you have achieved the perfect microfoam, it’s time to pour! Here are the steps to create a beautiful rosetta, one of the most popular latte art patterns:
1. Hold the Cup: Place your espresso-filled cup in one hand, tilting it slightly away from you. This angle will give you better control when pouring and prevent the excess movement of your pitcher-holding hand.
2. Pour into the Center: Begin by pouring the steamed milk slowly and steadily into the center of the espresso shot. Hold the pitcher about an inch above the cup.
3. Speed Up the Pour: Gently lower the pitcher closer to the cup and increase the speed of your pour, making sure to move steadily.
4. Wiggle the Pitcher: As the cup fills, gently move the pitcher back and forth, creating a zig-zag motion to form the first part of the rosetta pattern.
5. Finish the Pour: Once the cup is nearly full, raise the pitcher slightly and pour a thin stream of milk through the center of the zig-zag pattern. This will form the top of the Rosetta. Finish by pulling through to create the signature leaf-like shape.
Now that you have grasped the basics, it’s time to focus on perfecting your technique and taking your latte art to new heights.
Related: Basics of Latte Art for Beginners: A Step-by-Step Tutorial
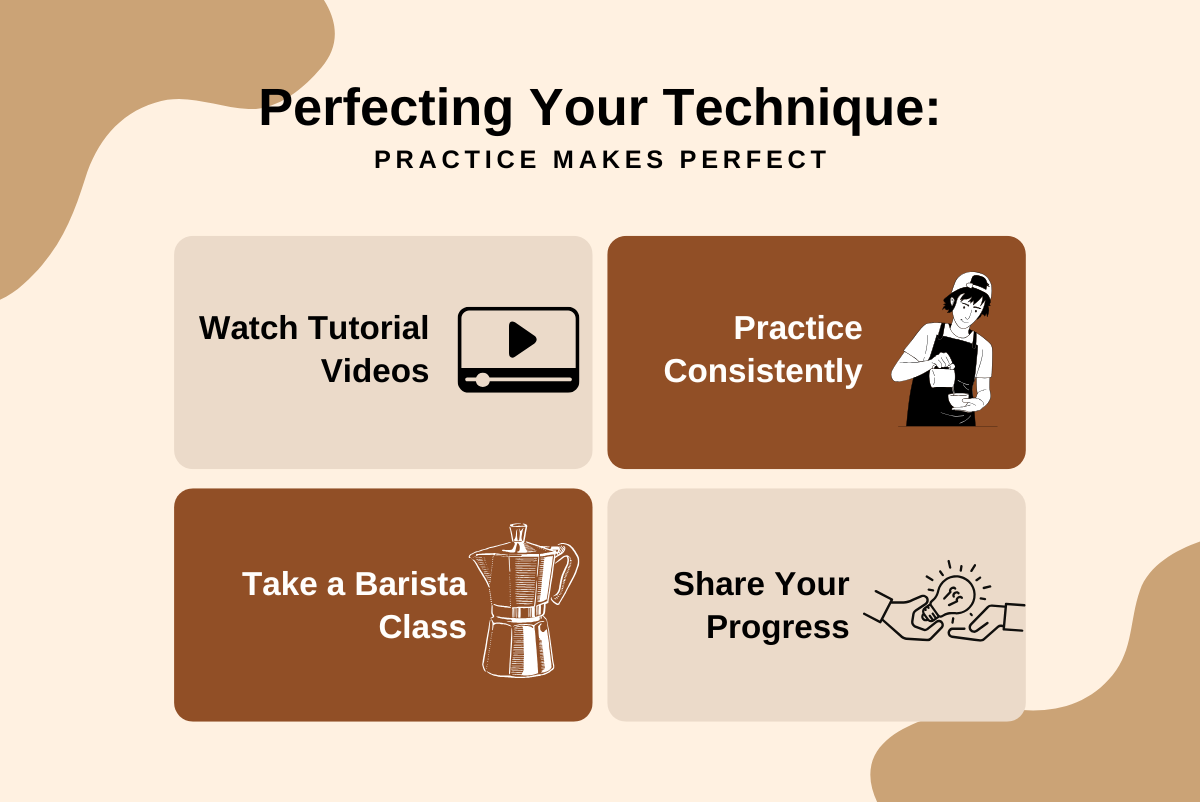
Creating impressive espresso designs takes time, persistence, and repetition. If your first few pours look more like blobs than hearts or rosettas, don’t stress; it’s all part of the process. Here’s how to sharpen your technique and stay motivated:
Watch Tutorial Videos
There’s a wealth of content online from champion baristas. Watching how others control their pour, manage milk flow, and create precise shapes can give you a visual reference that's invaluable.
Take a Barista Class
If you're serious about improving, a barista class can provide real-time feedback and corrections on your technique with professional guidance.
Practice Consistently
Practice regularly, even if it's just one or two pours a day. Consistency builds muscle memory, improving your control and confidence.
Share Your Progress
Snap a photo of your lattes and share them with friends, family, or online coffee communities. Feedback keeps you motivated and helps you track your improvement.
Mastering espresso designs at home is a blend of art and science, where practice, patience, and the right tools are key. From understanding the importance of milk texture to refining your pouring techniques, you will soon be creating intricate and beautiful latte art.
To take your espresso designs from good to great, investing in the right equipment makes all the difference. With the proper tools, you’ll unlock new levels of precision and creativity in every pour.
Whether you are upgrading your espresso machine, finding the perfect milk steamer, or discovering other accessories to elevate your coffee routine, Pro Coffee Gear offers everything you need to perfect your craft and transform your at-home coffee experience. Visit us today and secure value deals at discounted prices!
A. If your milk is too bubbly, too thin, or too thick, achieving latte art becomes difficult. The key to great latte art is properly frothed milk, which should have the texture of melted ice cream for smooth, creamy microfoam.
A. Yes, it does. A cup with a wide opening gives you more surface area to work with, which is crucial for creating detailed patterns like rosettas or swans. The larger the surface, the better your designs will appear.
A. Practice with alternatives. To save milk and coffee, you can practice latte art using a dish soap and water mixture or a coffee grounds and milk combo. You can also pour the milk and espresso mixture back into the pitcher, adding substitutes like chocolate powder to simulate the effect.
A. Yes, it is essential. Crema on top of espresso helps bind the milk and coffee together, creating a solid canvas for pouring high-contrast and well-defined latte art patterns. It makes the design process easier and more successful.
A. BCB (Barista Crema Booster) is a milk substitute that, when added to cold water, creates glossy, perfectly steamed liquid ideal for practicing latte art without wasting milk.