


Basics of Latte Art for Beginners: A Step-by-Step Tutorial
|
|
Time to read 13 min
Your Cart
Your cart
Favorites


Shop by Brands

Shop by Brands
Shop by Brands
Shop by Brands


Shop by Brands
Shop by Brands

|
|
Time to read 13 min
Have you ever watched a barista create intricate designs in your latte and wondered how they do it?
Latte art isn’t just for coffee shops—it’s a skill anyone can learn with a bit of practice and the right tools. Whether you’re a coffee enthusiast looking to level up your skills or simply curious about making your morning cup of coffee a bit more special, mastering the basics of latte art can completely transform your coffee experience.
In this tutorial, we’ll walk you through the essential steps to create beautiful latte art at home. From the tools you need to the techniques that will help you perfect your pours, we’ve got everything you need to become your own barista. Let’s explore the world of latte art and start creating those stunning designs with ease!
Image Created by AI
Latte art is creating beautiful designs on the surface of your coffee, typically made with espresso and steamed milk. The technique involves pouring steamed milk into a shot of espresso in such a way that it forms intricate patterns or pictures.
Latte art originated in Italy in the 1980s, when baristas began experimenting with combining milk and espresso to create visually appealing designs. Over time, it became a symbol of the artistry and craftsmanship involved in coffee-making. Today, latte art is a way to enhance the coffee-drinking experience and skill that baristas are proud to showcase, turning a simple cup of coffee into a work of art.
Latte art has become an integral part of coffee culture, especially in coffee shops that emphasize quality and presentation. A beautifully crafted design can elevate the coffee experience, adding a layer of creativity and personal touch to each cup. It also helps set the tone for the coffee-drinking experience, inviting customers to savor their coffee with their eyes and taste buds.
There are two main methods for creating latte art:
Free pour is the most common technique used by baristas. It involves pouring steamed milk directly into the espresso controlling the flow to create designs like hearts, rosettas, or tulips. This technique requires skill and control, as the design is formed by how the milk interacts with the espresso.
Etching involves creating designs by drawing into the foam with tools such as a toothpick or a stylus. It’s a more detailed and precise method, allowing for intricate designs like flowers, animals, and portraits. While more time-consuming, etching is a great way to express creativity and take latte art to the next level.
Creating beautiful latte art isn’t just about technique—it’s also about having the right tools. Whether you're a beginner or looking to perfect your skills, investing in quality equipment will make all the difference. Here are the essential tools you'll need to get started with latte art:
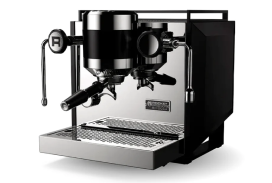
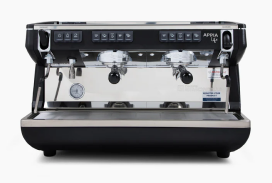
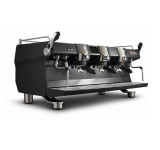
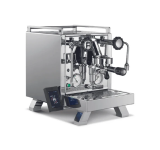
A high-quality espresso machine is the first and most important tool for creating latte art. A good machine is essential for pulling a consistent shot of espresso with the right balance of flavors and crema, which is the foundation for great latte art. The crema, the golden foam that forms on top of a well-pulled espresso shot, acts as the canvas for your milk design.
To achieve the best results, consider Pro Coffee Gear espresso machine designed with precise temperature control and powerful extraction capabilities to help you pull perfect espresso shots consistently. With an espresso machine that offers stability and consistency, you can focus more on your technique and less on adjusting settings.
A milk frothing pitcher is essential for steaming milk to the perfect texture. The right size and material will help you create the smooth, velvety, and glossy microfoam—perfect for pouring beautiful latte art. Stainless steel pitchers are highly recommended for their durability and heat conductivity, ensuring that milk is steamed evenly.
Choosing the right size pitcher is also essential. A smaller pitcher works best for making a single latte, while a larger pitcher allows for more milk to froth at once, making it ideal for multiple drinks.
Steaming milk to the perfect temperature is crucial for latte art. Too hot, and the milk will burn and lose its sweetness; too cold, and the texture won’t be smooth enough for pouring. The ideal temperature for steamed milk is between 150°F and 155°F.
A thermometer helps you precisely monitor the temperature, ensuring the milk reaches the right heat without overheating. Some espresso machines come with built-in temperature controls, but using a thermometer is a great way to ensure accuracy.
The steaming wand is what you’ll use to froth the milk, and its performance greatly affects the texture of the microfoam. A good steaming wand should allow you to introduce air into the milk in a controlled manner while also heating it evenly. A high-quality wand creates a fine, smooth microfoam that’s ideal for latte art, allowing you to pour intricate designs like hearts and rosettas.
With a Pro Coffee Gear espresso machine, you get a premium steaming wand that provides consistent pressure and control, allowing you to perfect your milk frothing skills.
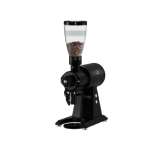
The quality of the espresso beans you use is the foundation for all latte art. Espresso requires beans that are roasted to bring out rich, intense flavors without being too bitter. High-quality espresso beans produce a well-rounded shot with a thick, creamy crema, which is key for creating beautiful designs.
Always use freshly ground beans for the best results. Whether you prefer Arabica for its smooth, sweet flavors or Robusta for its stronger taste and higher crema, quality beans make all the difference in the final cup.
By ensuring you have the right equipment—whether it's a top-tier Pro Coffee Gear espresso machine, the perfect milk frothing pitcher, or high-quality coffee beans—you’ll be well on your way to creating stunning latte art that rivals any café.
To master latte art, one of the most important skills you’ll need to develop is creating microfoam. But what exactly is microfoam, and why is it so crucial for making beautiful latte art? Let’s break it down.
Microfoam is the fine, velvety foam that you create when you steam milk. Unlike regular foam, which can be bubbly and uneven, microfoam is smooth, glossy, and free of large bubbles. It’s the ideal texture for pouring intricate designs because it can hold its shape while blending perfectly with the espresso’s crema.
Microfoam is essential for latte art because its smooth texture allows baristas to create intricate shapes, from hearts to rosettas and beyond. The key to great latte art is the ability to control the milk’s texture and pour it steadily, which is why mastering microfoam is the first step in achieving beautiful designs.
Steaming milk properly involves introducing air into the milk while also heating it to the perfect temperature. Here’s how to achieve the ideal microfoam texture:
1. Position the Steaming Wand: Place the steam wand just below the surface of the milk and slightly off-center. This will allow you to introduce air into the milk while also swirling it, creating a whirlpool effect.
2. Start Steaming: Turn on the steam and listen for a gentle hissing sound—this means you’re introducing the right amount of air. If the sound is too loud, you’re letting in too much air, which can result in frothy, uneven foam.
3. Texture Check: As the milk steams, keep an eye on the texture. The milk should gradually thicken and increase in volume. Stop once the milk feels warm to the touch and the texture is smooth and velvety—free from large bubbles.
4. Swirl and Tap: After steaming, give the pitcher a gentle swirl to mix the milk and break up any remaining large bubbles. Tap the bottom of the pitcher on the counter to settle the foam.
When it comes to steaming milk, temperature control is crucial. If the milk gets too hot, it can lose its sweetness and develop a burnt taste, which can ruin the flavor of your latte art. On the other hand, milk that’s not hot enough won’t foam properly.
The ideal temperature for steamed milk is between 150°F and 155°F. At this temperature, the milk has reached its optimal frothing point—smooth, velvety, and warm without losing its natural sweetness. A thermometer is a handy tool to ensure you’re reaching the right temperature, especially if you're just starting out with latte art.
The Role of the Steaming Wand in Creating Velvety Milk Foam
The steaming wand is crucial in creating microfoam. It’s not just about frothing the milk but about using the wand to create a swirling motion that blends air and milk evenly. The wand’s positioning and the amount of steam pressure play a major role in developing the perfect texture.
When you place the steaming wand at the correct angle, it allows you to introduce air gently while simultaneously heating the milk. This combination of air and heat creates the dense, smooth microfoam that is perfect for pouring beautiful latte art designs.
Mastering microfoam and steaming milk to perfection is an essential step in learning how to make latte art. With practice and the right tools, you’ll soon be able to create beautiful, professional-looking designs in your kitchen.
Creating beautiful latte art is all about precision and technique. Let’s break down the process into three easy steps to help you create stunning designs every time.
The foundation of great latte art starts with a well-pulled shot of espresso. A strong shot with the right balance of flavors and a thick, rich crema on top is essential for good latte art. The crema is crucial because it acts as the canvas for your milk, allowing you to create beautiful designs.
Next, steam your milk to the perfect microfoam texture. This involves introducing air into the milk while heating it to create smooth, velvety foam that can be poured with precision. The milk should have a glossy appearance and no large bubbles. A thermometer will help you reach the ideal temperature of 150-155°F, ensuring your milk is not too hot and retains its sweetness.
Now it’s time for the fun part—pouring! To create a basic heart design, tilt your milk frothing pitcher and pour gently into the center of your espresso. Start with a steady pour and then pour faster toward the end to form the heart shape. The key is to keep the pitcher close to the surface of the coffee to control the flow and create a clean design.
By following these steps and practicing regularly, you’ll be well on your way to mastering latte art. Keep experimenting, and soon, you’ll be pouring designs like a pro!
As you begin your journey into latte art, it’s essential to be aware of the common mistakes that can hinder your progress. While practice makes perfect, avoiding these pitfalls will help you achieve better results faster and set you up for success.
One of the most common mistakes in latte art is overheating the milk. When milk is steamed beyond 155°F, it can lose its sweetness and develop a burnt taste, which can negatively impact the flavor of your latte. Overheated milk also tends to separate and form a grainy texture, making it nearly impossible to pour a smooth, velvety design.
Tip: Always use a thermometer to ensure your milk reaches the ideal temperature of 150-155°F. This will keep the milk smooth, sweet, and perfect for pouring latte art.
Another common mistake is pouring the milk either too quickly or too slowly. If you pour too quickly, you risk splashing the milk and not forming the proper design. If you pour too slowly, the milk might sit on top of the espresso without blending with the crema, leaving you with an uneven design.
Tip: Aim for a steady, controlled pour. Start slowly and then gradually increase the speed as you approach the center to help form the shape. Consistency is key to getting that perfect heart or rosetta!
The texture of your milk plays a critical role in achieving beautiful latte art. Milk that is too frothy (with large, airy bubbles) or too thin (not enough microfoam) will make it difficult to pour clean, defined designs.
Tip: Aim for microfoam—smooth, velvety milk with a shiny appearance and no large bubbles. The milk should swirl effortlessly as you pour, creating a seamless interaction with the espresso’s crema.
When you’re just starting with latte art, it’s tempting to dive straight into advanced designs like rosettas or tulips. However, trying too hard too soon can lead to frustration and inconsistent results. It’s essential to start with simple designs and gradually build your skills.
Tip: Begin with heart shapes or simple swirls and focus on getting the technique right. Once you’re comfortable with the basics, you can move on to more intricate patterns, such as rosettas or even swans!
By being mindful of these common mistakes, you can improve your latte art technique faster and confidently create stunning designs. With practice and patience, you’ll soon be able to pour like a professional!
Learning how to make latte art is all about practice, and just like any skill, the more you practice, the better you get. Here are some tips to help you get started and build a successful practice routine at home.
Consistency is key when it comes to mastering latte art. Try to practice daily, even if it’s just for a few minutes. The more you practice, the more comfortable you’ll become with steaming milk, pouring, and adjusting your technique. Start by focusing on one specific element, such as getting the milk texture just right, before moving on to the pour itself. Repetition will help you build muscle memory and improve your accuracy over time.
As a beginner, it’s essential to start simple. Don’t overwhelm yourself by attempting complicated designs like rosettas or swans right away. Begin with basic shapes like the heart—this will help you focus on the basics of pouring, speed, and technique. Once you’re comfortable with a simple heart design, gradually challenge yourself by experimenting with more intricate patterns like tulips or rosettas.
The type of milk you use plays a significant role in achieving smooth microfoam. Whole milk is ideal for beginners because its higher fat content creates a rich, creamy texture that’s perfect for latte art. However, if you prefer alternative milk, such as almond or oat milk, you may need to adjust your steaming technique, as these milk types behave differently. Make sure to experiment with different types of milk to see which one gives you the best results for your latte art.
Once you’re comfortable with basic designs, it’s time to elevate your skills and dive into more advanced techniques. Here are a few tips to take your latte art to the next level:
After mastering the heart, you can begin experimenting with more complex designs such as rosettas, tulips, and even swans. These designs require more control over your pour and the movement of the milk. A rosetta, for example, involves pouring the milk in a slow, controlled motion while making a gentle back-and-forth movement to create a characteristic leaf-like shape. Don’t be afraid to experiment and push your limits—these advanced designs take time but are well worth the effort.
One of the most exciting aspects of latte art is the freedom to experiment. Try adjusting your pouring speed—a fast pour will give you different results than a slow pour. Play with your pitcher's movements to manipulate the direction and intensity of the pour. Subtle changes in technique can result in vastly different designs. Experimenting will help you discover your unique style and improve your precision.
To perfect your latte art skills, it’s important to have the right tools. A high-quality espresso machine, milk frothing pitcher, and steaming wand are all essential for creating the perfect microfoam and pouring with precision. Pro Coffee Gear offers a variety of premium tools, such as automatic espresso machines and precision frothing pitchers that can help you take your latte art to the next level. With the right equipment, you’ll be able to achieve consistent results and make your practice sessions even more enjoyable.
Mastering latte art is a fun and rewarding journey that combines the science of espresso brewing with the creativity of design. By starting with the basics, practicing regularly, and gradually progressing to more advanced techniques, you’ll be able to create stunning latte art in no time. Remember, the key is practice and patience—every pour is an opportunity to learn and improve.
So, whether you’re a beginner just starting with a simple heart or you’re aiming to pour intricate rosettas and tulips, enjoy the process of creating beautiful designs. With the right tools and dedication, you’ll soon be impressing friends and family with your barista-level latte art.
Ready to elevate your latte art skills? Explore Pro Coffee Gear’s range of espresso machines and accessories, designed to help you perfect every pour and create the perfect cup every time!
Our team can help you find the best fit based on your space, volume, and budget.
Talk to a Specialist


