


Shop by Brands


Shop by Brands


Shop by Brands
Your Cart
Your cart
Favorites


Shop by Brands
Shop by Brands
Shop by Brands
Shop by Brands


Shop by Brands
Shop by Brands
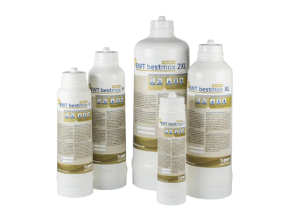
About your Filter:
First, let’s quickly get acquainted with your new filter. Your filter comes with 3 stages:
A particulate filter which captures tiny impurities
A carbon filter which removes chlorine and some chloramine
A softener which exchanges hard minerals like calcium and magnesium for hydrogen. The Bestmax Premium also releases a patented non-scale forming magnesium to enhance taste. This is the stage that gets partially used in your filter.
Special note: If your machine has steel boilers, you’ll want to test for chlorides and ensure your levels are below 30ppm. Chlorides cause pitting corrosion in the welds of steel boilers. This filter will not reduce chloride levels. Reverse osmosis is the only way to remove chlorides from your water. Copper boilers will not be affected by high chloride levels.
What is setting the Blend?
To maximize the lifespan of your filter, BWT includes a blend setting on the filter head. This allows you to tailor the level of softening to your water’s level of hardness. In most cases, you only need to send some of the incoming water through the 3rd softening stage of the filter to reach your ideal water hardness. Setting the blend on the filter head regulates how much water goes through the final softening stage of the filter vs. only going through the first two filter stages.
You’ll need to do the following to successfully set up your BWT Filter:
1- Initial water test: Setting your filter based on hardness. You’ll test your water to determine your current water hardness. You may use a dropper to do this or a simple test strip. If you’re using test strips, we recommend using Hatch Lab grade test strips, but a simple set from your local pool store will likely work. To measure hardness, you’ll be dipping your test strip in water and comparing the color to determine the approximate hardness of your water. It should look similar to the below photo.

Set blend setting: Take your result and choose a “Blend” setting on the below chart which corresponds with your PPM result. For example 214ppm correspond to a blend setting of “2”. A setting of 3 is the most blended whereas a setting of 1 is the least blended.

Filter lifespan: follow the row from your ppm CaCO3 result on the left side and match with your filter size on the right side to determine your filter lifespan. Your filter lifespan will be ~1 year or the lifespan on the chart, whichever comes first. Notice that the lifespan is in both liters and gallons.
You can use the same procedure for the BWT Bestmax, using the below chart.

2- Filter Install: Now you can begin installing your filter. Place the filter head on your filter. You will notice that there are a range of numbers on the filter head. These correspond to blend settings which allow water to bypass the softening resin. Set based on your above results.
3- Filter purge: Once you install the filter, flush the filter by using the purge valve on the premium filter head (white) or through the machine facing line on the regular head (blue). Purge about 1 gallon of water before connecting it to your machine.
4- Confirm filter settings: Test the water coming out of the filter to ensure the settings are coming out as expected. Pay close attention to Alkalinity as the BWT guide is based on hardness. If alkalinity is too high, you may need to adjust your blend setting.
For reference, you’ll want to compare your results to the below parameters.

If you have any questions or need assistance to know exactly what you need, send us an email or give us a call.
Email: info@procoffeegear.com
Phone: +1 (512) 240-2455
We'd love to hear from you!