


The Ultimate Guide to Using a Tamping Station Espresso Setup
|
|
Time to read 9 min
Your Cart
Your cart
Favorites


Shop by Brands

Shop by Brands
Shop by Brands
Shop by Brands


Shop by Brands
Shop by Brands

|
|
Time to read 9 min
Did you know that espresso quality hinges on at least five key variables, including how densely coffee grounds are packed before brewing? It’s true: grind size, water temperature, pressure, time and how the coffee is tamped together determine extraction quality.
In fact, scientific research shows that coffee particle distribution and tamping directly affect how water flows through the espresso puck, influencing key compounds in your shot.
That’s where a tamping station espresso setup becomes more than just another accessory. Let’s break down why a tamping station is one of the simplest upgrades that can dramatically improve your espresso consistency.
Consistency Upgrade: A tamping station espresso setup stabilizes your portafilter and eliminates angle errors, giving you more repeatable extractions.
Better Workflow: Stations streamline puck prep for both home baristas and café teams, reducing variation between shots and between baristas.
Professional Control: Ideal for dialing in new beans, training staff, or maintaining quality during high-volume service.
Right Tool, Better Espresso: Adding a tamping station is one of the most effective low-friction upgrades you can make to improve your espresso routine.
Before you ever pull a shot, there’s a moment where everything depends on how stable and level your portafilter is, and that’s exactly the moment a tamping station steps in. It takes the guesswork, wobbling, and uneven pressure out of your workflow, giving you a reliable foundation for consistency shot after shot.
This simple tool might look minimal, but in espresso prep, it’s a quiet powerhouse.
Now that you know what a tamping station does, here are the key features that separate a good setup from a truly reliable one.
Rock-Solid Stability
A tamping station should stay firmly in place, even when you apply strong tamping pressure. If your portafilter shifts or dips, consistency goes out the window. A stable platform lets you focus on technique instead of fighting movement.
Proper Portafilter Fit
The station should hold your portafilter securely and level. When the fit is right, tamping becomes effortless and predictable, reducing the risk of uneven density and channeling during extraction.
Non-Slip Base for Safe, Confident Use
A grippy base keeps the entire station from sliding across your counter. This small detail makes a huge difference, allowing you to tamp firmly without hesitation or the fear of knocking anything over.
Organized Tool Placement
Integrated spots for your tamper, distributor, or small brushes keep your workflow smooth and your space clean. When everything has a home, you avoid unnecessary pauses and build a consistent rhythm shot after shot.
Durable, Long-Lasting Materials
High-quality metal or hardwood ensures the station can handle daily use without bending, wearing down, or losing stability. Good materials also add weight, which further improves steadiness.
Ergonomic, Comfortable Design
The station should support a natural wrist angle and a comfortable tamping height. A well-designed station reduces strain, keeps your movements consistent, and helps you maintain technique over long sessions.
Easy-to-Clean Surfaces
Smooth finishes and smart contours prevent grounds from collecting in crevices. A quick wipe-down should be all it takes to keep your setup clean and ready for the next shot.
Also Read: Best Espresso Tamper for Perfect Coffee
With the right features in place, using a tamping station becomes less about guesswork and more about mastering a reliable workflow.
When we talk about using a tamping station, we’re really talking about building a workflow that works for you. One that feels smooth, repeatable, and genuinely elevates your espresso quality. With the right steps in place, we can turn a simple tool into a pro-level routine that delivers consistent results shot after shot.
Let’s walk through the steps we recommend for getting the most out of your tamping station.
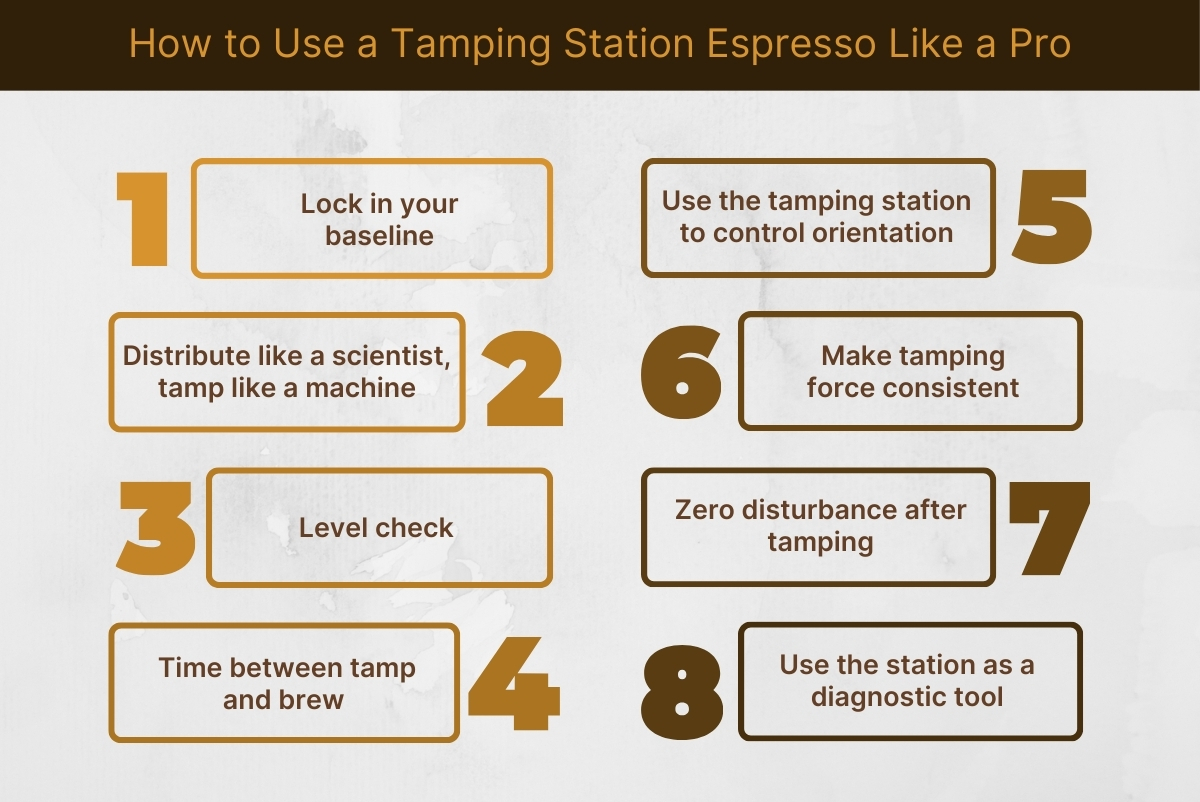
Before the tamping station even enters the picture, we lock down three things:
Basket size & type (e.g., 18 g VST / IMS basket designed for a specific dose range)
Target dose (say 18 g in, 36–40 g out for a 1:2–1:2.2 ratio)
Grind size tuned so that this dose/extraction lands in the right time window (often ~25–30 seconds for a double, depending on style)
Why this matters: A tamping station doesn’t “fix” bad parameters. It amplifies repeatability once dose, grind, and ratio are in a good place. So our first rule is: don’t change tamp to fix grind; adjust grind to fix flow.
When we place the portafilter into the tamping station, we’re not just parking it somewhere:
We make sure the basket is perfectly horizontal relative to the counter (no tilt front/back or left/right).
We always insert it the same way (handle orientation), so any small manufacturing tolerances are consistent from shot to shot.
Why it matters: even a slight angle during tamp can create a denser side of the puck, forcing water to preferentially flow through the looser side → classic channeling.
We split puck prep into distribution and tamping instead of treating tamping as a “fix-all.”
Distribution:
After grinding into the basket, we break up clumps and level the bed (taps, WDT, or distributor).
The goal: the coffee density should be as uniform as possible before tamping.
Tamping:
We place the tamper in the basket with the edges touching evenly all around.
We apply firm, steady pressure straight down, with our wrist neutral and elbow roughly at 90°.
We’re not chasing an exact kg/lb number; we’re chasing repeatable force and a dead-level surface.
Why this matters: The tamping station gives a stable anchor so all your energy goes into vertical compression instead of stabilizing a moving portafilter.
There’s good evidence that, beyond a certain threshold, more force doesn’t improve extraction; consistency does. Over-tamping doesn’t magically “improve” espresso; it just makes your wrist tired and can compress fines too much.
How we approach it:
We aim for a firm but sustainable force we can repeat all day (whether that’s ~15–30 lb equivalent doesn’t matter as much as repeatability).
We use the tamping station to allow that force to go straight down instead of fighting lateral wobble.
Some pros use calibrated tampers; if you don’t, the station still helps you build muscle memory because the portafilter position never changes.
Why this matters: once grind and dose are dialed in, small tamp force variations have less impact than you think, but angle and consistency still do. The tamping station espresso setup helps with both.
After tamping, we don’t just trust the feel; we verify:
Visual check: the top of the puck should look flat relative to the basket rim.
Tactile check: we sometimes run a (clean) finger lightly across the rim to feel if one side of the puck is noticeably lower.
If something is off:
We don’t tamp harder on one side (that makes things worse).
We reassess the distribution and how the portafilter is seated in the station.
Why it matters: level tamp = more uniform hydraulic resistance = more even extraction across the puck.
Once we remove the portafilter from the station, we treat the puck like it’s “locked”:
No banging the side of the portafilter.
No tapping against the counter.
No knocking the basket trying to “clean up” stray grounds.
We wipe the rim and ears only, not the puck surface.
Why this matters: any impact can cause micro-fractures or separate the puck from the basket wall, creating bypass paths for water.
We aim to:
Go from tamping → locking into the grouphead → starting the shot within a few seconds.
Avoid letting the puck sit too long exposed to humid air or pre-infusion water (in some workflows).
Why it matters: Over time, the puck can start to absorb ambient moisture or swell unevenly, slightly changing resistance before the shot even begins.
Keeping this interval consistent is another small but real way a tamping station espresso routine improves repeatability.
Professionally, we treat the tamping station as a reference surface for troubleshooting:
If shots run faster on one group than another, but our tamp, and station are constant, we look at grind, basket, shower screen, or machine rather than blaming tamping.
If we see repeated channeling from one side during naked portafilter tests, we check:
Is the tamping station on a level counter?
Is the portafilter always seated identically?
Is the grinder distributing unevenly?
The beauty of a stable tamping station espresso setup is that it removes one major variable, making it easier to diagnose the rest of the system.
Doing this in the same order every time builds a muscle-memory system where consistency is baked in.
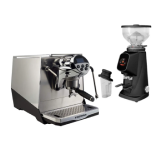
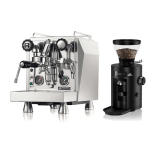
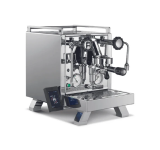
Pair the Anfim Alba + PUQ M2 with a purpose-built tamping station designed for speed, precision, and barista ergonomics. Reduce prep time, improve consistency, and keep your bar organized—no guesswork, no wasted motion.
Also Read: Important Features to Consider When Buying an Espresso Machine
Now that we’ve built a strong workflow around consistent tamping, it’s worth looking at how a tamping station compares to other tools you might already be using.
When we talk about puck prep, tamping is only one piece of the workflow, but how you stabilize the portafilter during that moment makes a measurable difference. Many of us start with a tamper mat or just hold the portafilter in our hand. While those options work, they introduce small inconsistencies that add up over time.
Before deciding which tool belongs in your setup, it helps to understand what each one actually does well and where it falls short.
Here’s how a tamping station stacks up against other common tamping tools.
|
Tool / Setup |
Key Strengths |
Main Limitations |
Best For |
|
Tamping Station (Espresso) |
Standardizes where and how tamping happens; reduces variation between baristas; keeps puck prep in one defined “station.” |
Requires counter space and a fixed layout; less flexible in tiny setups |
Cafés with rotating staff, home baristas building a repeatable tamping station espresso routine |
|
Tamp Mat Only |
Low-cost, compact, easy to drop into any layout; protects the counter from the portafilter and tamper |
Offers no support for portafilter orientation; shot quality depends heavily on each barista’s hand control |
Beginners, ultra-compact home setups, temporary or mobile bars |
|
Handheld Tamping (No Mat/Station) |
Zero extra hardware; works in a pinch |
Inconsistent angles, harder to train across staff, more fatigue over a shift, and the highest risk of shot-to-shot variation |
Absolute minimalists, backup method when no other surface/tool is available |
|
Tamper + Distributor (No Station) |
Excellent for fine-tuning puck density and surface; great for dialing in advanced recipes |
Still depends on how you stabilize the portafilter; it doesn’t solve orientation or workflow layout on its own |
Advanced home users and specialty cafés prioritize puck prep detail |
|
Automatic / Calibrated Tamper |
Delivers consistent tamp pressure quickly; reduces barista fatigue over long shifts |
Higher cost; still benefits from a defined puck prep area or station for total workflow control |
Busy shops, multi-barista environments, chains, or specialty cafés with strict consistency standards |
Also Read: Differences Between Various Types of Milk Coffee Drinks
Once you understand how each option shapes your espresso routine, it becomes much easier to build a setup that works with you, not against you.
A tamping station espresso workflow isn’t about adding another accessory to your counter; it’s about creating a foundation you can rely on. At Pro Coffee Gear, we see this every day. When baristas upgrade their workflow with the right tools, their confidence grows, their shot quality stabilizes, and their overall espresso routine becomes smoother and more predictable.
Level up your espresso workflow today. Explore Pro Coffee Gear’s tamping stations and precision tools to build a setup that delivers consistent, café-quality results.
Yes — stations reduce hesitation and hand adjustment between shots, allowing baristas to maintain a consistent pace during rush hours without sacrificing quality.
Absolutely. Even with automated tamping, a station creates a defined puck-prep area, keeps portafilters stable, and reduces cross-contamination during high-volume workflows.
Yes. With a fixed orientation and stable base, new baristas learn level tamping more quickly and build muscle memory without fighting portafilter wobble or uneven angles.
Both work, but stainless steel offers superior weight, hygiene, and durability for commercial use, while wood brings stability and aesthetics suited for home bars.
It can if the station has poorly machined edges or incorrect sizing. A proper fit protects the ears and keeps the portafilter seated without unnecessary force.
Our team can help you find the best fit based on your space, volume, and budget.
Talk to a Specialist

