


How to Calibrate Your Coffee Grinder for Precision Brewing
|
|
Time to read 13 min
Your Cart
Your cart
Favorites


Shop by Brands

Shop by Brands
Shop by Brands
Shop by Brands


Shop by Brands
Shop by Brands
|
|
Time to read 13 min
You might have the best beans, an advanced espresso machine, or the latest pour-over setup, but even the finest gear can’t overcome a poorly calibrated grinder. Small inconsistencies in grind size can completely alter how water extracts flavor from your coffee, leading to cups that taste bitter, sour, or flat, even when you’ve done everything else right.
That’s why understanding how to calibrate your coffee grinder is one of the most essential steps in mastering precision brewing. Whether you’re pulling a 1–2 oz espresso shot or brewing a 12 oz French press, a well-calibrated grind helps you enjoy the same rich flavor every time.
In this coffee grinder calibration guide, we’ll break down why grinder calibration matters, how to do it step-by-step, and what to look for when fine-tuning your grind.
At a Glance:
Proper grinder calibration keeps coffee grind consistency uniform and flavor balanced in every cup.
Following a clear calibration process ensures consistent results for espresso, pour-over, or French press.
Regular maintenance and awareness of factors like humidity and bean type help your grinder stay accurate.
Fixing issues such as grind inconsistency, static, or clogging preserves long-term precision and flavor quality.
Calibration isn’t just a one-time setup; it’s the process of fine-tuning your grinder to suit your brewing method, coffee beans, and flavor preferences. Here’s why this step is essential for precision brewing:

Improves Extraction Accuracy: A calibrated grinder ensures even water flow through the grounds, preventing over-extraction (bitter) or under-extraction (sour). The right grind brings out your beans’ full flavor potential.
Enhances Consistency: Once you’re dialing in your coffee grinder, calibration helps you recreate your favorite taste and strength in every brew, whether espresso, pour-over, or French press.
Optimises Brew Time: A calibrated grinder helps you stay within ideal extraction times, about 25–30 seconds for espresso, 2.5–3.5 minutes for pour-over, and 4 minutes for French press, delivering predictable, repeatable results.
Supports Equipment Longevity: Consistent calibration reduces strain on the grinder and helps maintain burr alignment, extending its lifespan.
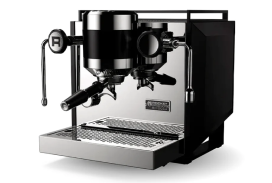
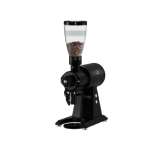
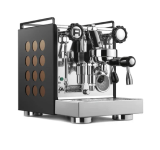
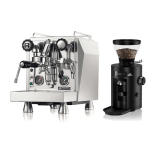
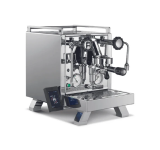
Delivers Professional Precision: With tools like our Eureka Atom Excellence 75, you can fine-tune grind size with micrometric accuracy and achieve true café-level consistency at home.
In short, calibration is your control lever; it ensures you can repeat great results, no matter the method or bean you use. Now that you understand why calibration plays such a vital role, let’s break down what it actually involves and how it influences your brew.
Before adjusting your grinder, it’s helpful to know what calibration actually means and how it impacts your brew. This understanding helps you calibrate confidently and avoid confusion.
In simple terms, calibration aligns your grinder’s burrs or blades, so they consistently produce coffee particles of the desired size for your brewing method. This precision determines how evenly water extracts flavor compounds during brewing, and ultimately, how your coffee tastes.
Grind size is the foundation of every brew. Each brewing method requires a specific grind size to achieve proper extraction, the process of dissolving coffee’s soluble flavors into water.
Fine grinds (200–300 microns) are ideal for espresso, where pressurized water needs to pass through compact coffee in 25–30 seconds.
Medium grinds (700–900 microns) suit pour-over or drip brewing, allowing even water flow for a 2.5–3.5 minute brew.
Coarse grinds (1200–1500 microns) work best for the French press, where coffee steeps for about 4 minutes.
A consistent grind ensures every coffee particle extracts evenly. If some grounds are finer than others, water over-extracts them (causing bitterness) while under-extracting coarser pieces (causing sour or weak flavor). Proper calibration keeps your brew balanced, giving it clarity and harmony.
Recognising when your grinder is off helps you catch flavor issues early and maintain consistency. Here are some common signs:
Inconsistent grind texture: If your grounds look uneven, with a mix of powdery fines and chunky pieces, your grinder likely needs recalibration or a burr cleaning.
Irregular extraction times: Espresso shots pulling in under 20 seconds (too coarse) or over 35 seconds (too fine) often signal miscalibration.
Taste imbalance: Overly bitter or sour flavors suggest uneven particle size distribution.
Channeling in espresso: Water creates uneven paths through the puck when grind uniformity is off, leading to patchy extraction.
If you notice any of these signs, recalibrating your grinder can quickly restore the balance and flavor consistency you want. In the following section, let’s walk you through the exact steps to fine-tune your grinder for precision brewing.
Calibrating your grinder may sound technical, but with the right process, it’s simple and rewarding. Follow these detailed steps to fine-tune your grinder for precise, consistent brewing results.

Before you start, determine which brewing method you’re optimizing for. Each method requires a specific grind size and extraction range.
For example:
Espresso: Fine grind (200–300 microns) with a 25–30 second extraction time, creating rich, concentrated flavors under pressure.
Pour-over (V60, Chemex): Medium grind (600–800 microns) with a 2.5–3.5 minute brew, allowing steady water flow and clarity in taste.
French Press: Coarse grind (1000–1200 microns) with a 4-minute steep, promoting full-bodied texture and low acidity.
Knowing your method guides your starting point and acceptable range.
Clean equipment is the foundation of accurate calibration. Old coffee grounds and oils can distort both grind consistency and flavor clarity.
Steps to clean effectively:
Unplug and empty: Disconnect your grinder and clear any leftover beans to avoid clogging.
Brush and vacuum: Use a grinder brush or handheld vacuum to remove grounds from burrs and chute areas where residue tends to accumulate.
Avoid moisture: Never use water unless your manufacturer allows it; moisture can cause rust and internal damage.
Use a cleaner: Products like Urnex Rinza Tablets M61 safely remove coffee oils and buildup without disassembling your grinder.
Inspect burrs and chute: Make sure burr surfaces are clean and free of any fine dust, which can affect grind uniformity and speed.
A clean grinder eliminates variables, giving you accurate calibration feedback and ensuring that flavor differences come from grind changes, not contamination.
Start with a baseline grind setting based on your brewing method. This helps you understand where your grinder stands before you begin fine-tuning.
How to start:
Follow the manufacturer’s guide: Most espresso grinders begin calibration near the fine end, while pour-over and immersion brewers sit in the mid to coarse range.
Grind a small dose: Use around 10–15 grams of coffee to test the initial setting and save beans while calibrating.
Check grind texture:
Fine: Feels like table salt, ideal for espresso, promoting controlled resistance.
Medium: Feels like beach sand, suited for pour-over methods for even water flow.
Coarse: Feels like sea salt, perfect for French press and cold brew.
Observe uniformity: Look for consistent particle size with minimal clumping or dust; uneven texture suggests dull burrs or misalignment.
Use the tactile “finger test.” Rubbing a pinch between your fingers helps you sense coarseness instantly.
Grind calibration only works when your coffee and water ratios remain constant. Measuring accurately allows you to isolate grind size as the single variable.
Recommended brew ratios:
Espresso: 18g coffee → 36g espresso (1:2 ratio), ensuring dense extraction.
Pour-over: 20g coffee → 300g water (1:15 ratio) for balanced clarity.
French Press: 25g coffee → 400g water (1:16 ratio) for a full-bodied brew.
Steps for accuracy:
Use a digital scale: A precise scale ensures you hit exact weights down to 0.1 grams.
Weigh water and coffee: Always measure both to maintain accurate brew ratios for testing consistency.
Avoid eyeballing: Even a 1g variance can noticeably affect extraction strength and flavor profile.
Consistent dosing guarantees that changes in flavor or flow come from grind size — not from inconsistent coffee amounts or water ratios.
Now it’s time to test. Brew your coffee and observe the physical and sensory indicators of extraction quality.
Key things to monitor:
Brew time:
If espresso runs too fast (<20s), grind finer to slow the extraction.
If it’s too slow (>35s), grind coarser to reduce resistance.
Taste profile:
Sour or sharp flavour - under-extracted (grind finer).
Bitter or dry aftertaste - over-extracted (grind coarser).
Flow behavior:
For pour-over, water should flow smoothly without pooling or staling.
For the French press, observe sediment and texture to gauge grind uniformity.
Crema or bloom: In espresso, look for thick, golden crema; for pour-over, ensure even blooming without channeling.
Keep a record of brew time, extraction results, and taste impressions after each test. These notes become your calibration reference guide.
Once you’ve tested, it’s time to refine it based on flavor and data. Adjust gradually to find your perfect extraction point.
Steps for fine-tuning:
Make small changes: Turn the grinder dial slightly; even one click can shift espresso extraction by 2–3 seconds.
Use flavor as a guide:
Sour: grind finer to increase extraction contact.
Bitter: grind coarser to speed up water flow.
Record adjustments: Keep detailed notes of grind settings, brew times, and outcomes to track improvement.
Compare brews: Taste side-by-side to identify the most balanced profile.
Adjust one variable at a time: Don’t alter dose, water, and grind simultaneously, or it becomes difficult to trace results.
Aim for balanced flavor, smooth mouthfeel, and brew time matching the target range for your method.
Once your brew tastes balanced, you’ve “dialed in.” From there, keep repeating your process to maintain that sweet spot.
Keep a calibration log noting:
Record settings: Note your grinder dial number and bean type to recreate results easily.
Track brew data: Include brew time, water ratio, and temperature alongside flavor notes.
Monitor daily performance: Re-test extraction occasionally to ensure no drift in coffee grind consistency.
Label containers: Mark bean jars with grind settings for quick reference during routine brewing.
This record helps you recalibrate quickly if settings drift over time or if you switch beans or roast levels.
Even perfectly calibrated grinders can produce slightly different results due to changes in coffee, weather, or roast profile. Adjust proactively to stay consistent.
Factors to monitor:
Bean density:
Light roasts are dense and require finer grinds for proper extraction.
Dark roasts are brittle and need coarser grinds to prevent over-extraction.
Humidity:
High humidity can cause clumping and slower water flow.
Low humidity leads to static buildup and uneven retention.
Temperature and altitude: Cooler conditions may require slightly coarser grinds; warmer air can speed up flow.
Roast freshness: Freshly roasted beans release CO₂ that can alter bloom and extraction time.
Adjust your calibration slightly each day or batch to account for these variables, especially in commercial environments.
Grinders experience natural wear and performance drift over time. Regular maintenance ensures accuracy, longevity, and consistent grind quality.
Maintenance schedule:
Recalibrate frequently: Every 2–4 weeks for home use and weekly for commercial setups.
Replace burrs: Follow manufacturer guidance — typically after grinding 300–600 kg of coffee.
Inspect internal parts: Look for oil buildup, misalignment, or unusual sounds that indicate wear.
Deep clean regularly: Use grinder-safe cleaners like Cimbali Ecojeston LT1 to preserve burr sharpness.
Lubricate moving parts: Some commercial grinders benefit from light maintenance lubrication to maintain performance.
Regular monitoring prevents flavor inconsistencies, improves grinder longevity, and maintains true precision brewing standards. Next, let’s explore advanced techniques for next-level precision.
Once you’ve mastered basic calibration, advanced techniques let you fine-tune performance even further, especially if you’re working with commercial grinders or high-end setups.

Even slight misalignment between burrs can cause uneven grind sizes, creating inconsistent extraction and muddled flavors. Keeping your burrs perfectly parallel helps maintain uniform particle size, which is key to even water flow and balanced flavor.
Many professional grinders, such as the Macap M140 from Pro Coffee Gear, come with user-friendly alignment tools, making calibration precise and repeatable without complicated adjustments.
Grind retention refers to leftover grounds trapped inside the grinder after each use — and even a few grams can change your flavor consistency. These retained grounds often mix stale coffee with fresh beans, leading to inaccurate calibration results.
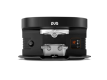
To avoid this, purge 2–3 grams of coffee before brewing, especially when changing grind settings. Low-retention grinders like the Fiorenzato AllGround are designed to minimize waste and deliver cleaner, more accurate calibration results.
The grinder’s motor speed (RPM) and heat output directly affect grind consistency. When the motor runs too fast, it can heat up the burrs, slightly expanding them and altering the grind size, particularly with espresso.
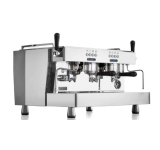
Choose a grinder with adjustable RPM settings or built-in cooling features to keep the temperature stable. Models such as the Mazzer Super Jolly V UP maintain a good balance between speed and temperature control, ensuring your calibration stays precise during long brewing sessions.
For baristas and enthusiasts who value precision, a coffee refractometer offers measurable insight into your brewing consistency. It measures total dissolved solids (TDS), the percentage of coffee solubles in your brew, giving objective data to guide your calibration choices.
A well-calibrated espresso typically measures 8–12% TDS, while filter coffee ranges between 1.2–1.5%. Compare these readings with taste results to fine-tune your grind size and extraction for consistently balanced cups.
Advanced calibration lets you move from “good enough” to truly consistent brewing. In the following section, let’s look at how to troubleshoot the most common calibration problems.
Even with proper technique, calibration challenges can arise. Here are some common issues and practical ways to fix them.
1. Inconsistent Grind Output
When your grinder starts producing uneven coffee particles, some too fine, others too coarse, it’s a sign of mechanical or cleanliness issues. This leads to mixed extraction, resulting in flat or imbalanced flavor.
Fixes:
Clean the grinder thoroughly to remove old grounds or oil buildup that might be blocking burrs.
Tighten any loose adjustment knobs or burr screws to prevent unwanted movement.
Replace burrs if they show signs of wear, especially after heavy use (usually every 500–750 lbs of coffee).
2. Static and Clumping
If grounds stick together or cling to the chute, static electricity is likely the cause. This results in uneven dosing and poor distribution, especially noticeable in espresso shots.
Fixes:
Lightly mist coffee beans with water using the Ross Droplet Technique (RDT) before grinding to reduce static.
Keep your grinder and workspace dry but not overly low in humidity; static worsens in dry air.
After grinding, gently stir or shake grounds to break clumps before brewing.
3. Calibration Drift
Sometimes your grind setting shifts gradually over days or weeks, even without manual changes. This “drift” happens due to vibration, burr movement, or internal wear, leading to subtle but noticeable changes in taste and extraction time.
Fixes:
Check and tighten the adjustment collar or locking mechanism regularly.
Mark your ideal grind setting so you can easily see if it moves.
Recalibrate weekly or when switching bean types to keep results consistent.
4. Clogging or Stalling
When your grinder clogs or slows down, it’s often due to grinding too fine for your chosen brew method or letting coffee oils and residue build up inside. You’ll notice this especially when your espresso pulls too slowly or your pour-over flow rate stalls.
Fixes:
Adjust the grind slightly coarser and test your brew again, espresso shots should extract in 25–30 seconds.
Use a grinder cleaning product like Urnex Rinza Tablets M61 regularly to remove oil residue and buildup.
Ensure beans are completely dry before grinding; moisture can worsen clogging issues.
Troubleshooting is part of the craft. With practice, you’ll intuitively recognize when your grinder needs attention.
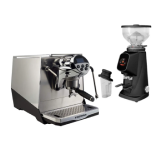
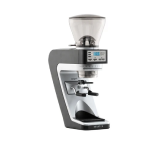
At Pro Coffee Gear, we believe precision starts with the right tools. Our grinder, such as the Eureka Atom Excellence 65 and Baratza Forte AP, offer micrometric adjustments that make calibration easy, helping you achieve consistent, café-quality flavor in every brew.
Calibrating your coffee grinder isn’t a one-off task; it’s an ongoing skill that shapes your brewing precision. By mastering how to calibrate your coffee grinder, you take charge of flavor balance, extraction timing, and cup quality. Every adjustment you make, from grind fineness to dose weight, brings you closer to consistent, repeatable excellence.
Remember, precision brewing isn’t about chasing perfection; it’s about achieving repeatable, enjoyable quality every day. At Pro Coffee Gear, we’re passionate about helping you achieve that level of control. We offer carefully curated grinders, scales, and accessories built to deliver precision at every step of your coffee journey.
Shop now to find the perfect tools for your next brew, and experience precision in every grind.
Calibrating a coffee grinder means adjusting the grind size settings to achieve the ideal particle consistency for your brewing method. It ensures that your grinder produces uniform grounds, allowing balanced extraction, consistent flavor, and optimal performance with each cup of coffee.
You should calibrate your coffee grinder every few weeks or whenever you notice changes in taste, extraction time, or grind consistency. Frequent calibration is also recommended after cleaning or maintenance to maintain precision and brewing consistency.
Essential tools include a digital scale for accurate dosing, a timer to measure extraction time, and a burr cleaning brush. Some professionals also use a refractometer or calibration coffee to fine-tune grind settings for consistency.
Yes, recalibration is necessary when switching between different coffee beans or roast levels. Each variety has a unique density and oil content that affects grind resistance, so minor adjustments help maintain consistent extraction and flavor.
Always unplug the grinder before making internal adjustments or cleaning. Avoid inserting tools or fingers near the burrs, and ensure all parts are dry before reassembly. Follow manufacturer guidelines to prevent mechanical damage or personal injury.
You can adjust your grinder for versatility, but each brew method usually requires a specific grind size. It’s best to set a primary calibration for your most-used method and make minor adjustments for others to maintain consistent extraction and flavour across different brewing styles.
Avoid using inconsistent beans, skipping scale measurements, or neglecting to clean the grinder. Changing settings too frequently or not considering dose and tamping pressure can also lead to uneven extraction and unpredictable flavour. Precision and patience are key for reliable calibration.
Our team can help you find the best fit based on your space, volume, and budget.
Talk to a Specialist

